


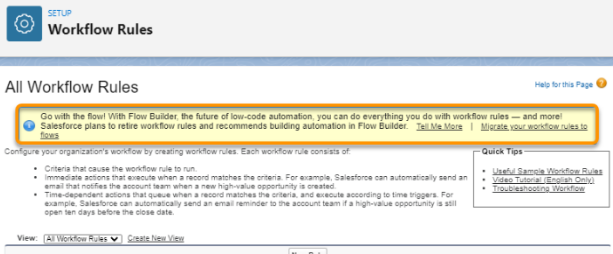
By the end of the year, Salesforce will be retiring Workflow Rules and Process Builders. While our current Workflow Rules and Process Builders will continue to work as they were, we will not be able to create new automation using these tools. Instead, Salesforce will be suggesting us or forcing us(time will tell) to create everything in Flows. And why not? At this point, Salesforce Flow has everything that you need, and with better control.
Salesforce isn’t coming out of the wild and forcing this flow thing on you. If you are worried that you don’t know how to move these WFR and PBs to flow, salesforce is providing you a tool for migrating these to flows. Which is a good thing but bad for you. Let’s just say that they will create a flow for each of your Workflow/Process Builders. Which is not efficient and a headache if you want to manage these automation properly.
So, we are here for you. This article will show you a flow Framework(only if you want to call that) that you can follow while building the flows. Or better, it will let you build a structure in which you can move your WFRs and PBs with ease of control.
Salesforce Flow Structure
If you’ve worked with Apex Triggers, you know that One Trigger per Object is the recommended. Now as Salesforce is putting so much power in Flows, 1 Flow per object is bound to come as a recommendation. In this article we will show you a structure that is familiar to you.
Let’s take an example of an Apex trigger on Account Object. We create the structure of AccountTrigger -> AccountTriggerHandler Class -> AccountTriggerAction Class
We will follow the same structure, we will have a flow but with sub-flow attached in a way you can control.
Global Switches
Before we dig deeper into the framework, we’ll need a place where we can control these automations of flows and subflows. The reason why WFRs were so successful at the beginning is because they were simple, to the point and admins had a way to completely turn them off, with simple click. They were so easy to implement and maintain that you could find hundreds of WFR in any organization’s Salesforce instance.
So, to have that ease of access, we had to bring this feature into our framework as well. So we’ll create a Custom Global Switch in our structure. Some of our experts are already using these kinds of switches in the Process Builders and it was a good practice.
In Salesforce we have Custom Metadata and Custom Setting which we can use to create this switch. We have multiple ways to achieve it.
- Custom Setting (Hierarchy type)
- Custom Setting (List Type)
- Custom Metadata
If you are wondering where in the flow we will be using these switches, then worry not. We will be creating records of these Custom Settings or Custom Metadata and fetch these in our flows in our decision element(Decision Element).
NOTE: In case you decide to go with either Custom Setting(List Type) or Custom Metadata, you’ll have to query those into the flow. But Custom Setting of Hierarchy type will be accessible directly.
Custom Metadata or Custom Setting (List Type)
In case of Custom Settings or Custom Metadata, we can build the structure of this switch like shown in the below screenshot:
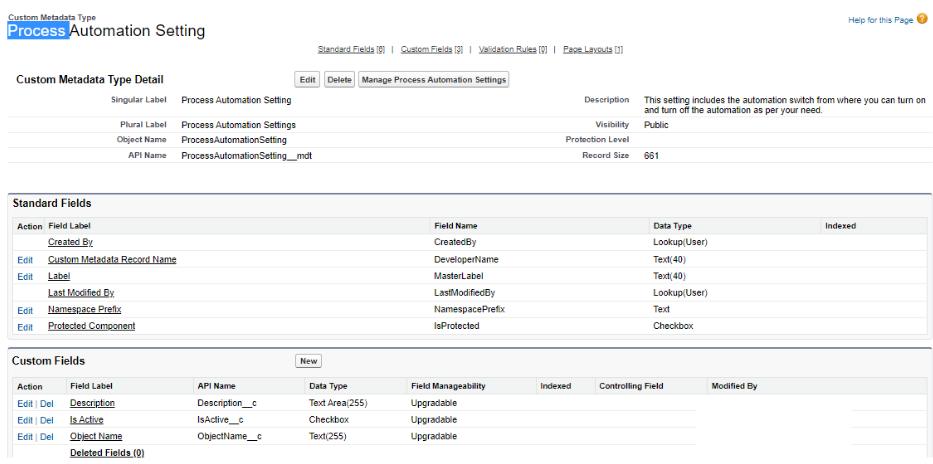
If you see, this is a simple Custom Metadata with three custom fields created. The Label will contain name of the Functionality, Description will contain a small description of what the functionality is about(in case the Label don’t help, description will help understanding for which functionality the switch is for), isActive which is to toggle the functionality On/Off and last is Object Name, which will mention the object on which the functionality is for.
Check the below screenshot on how we will be using these in the flow:
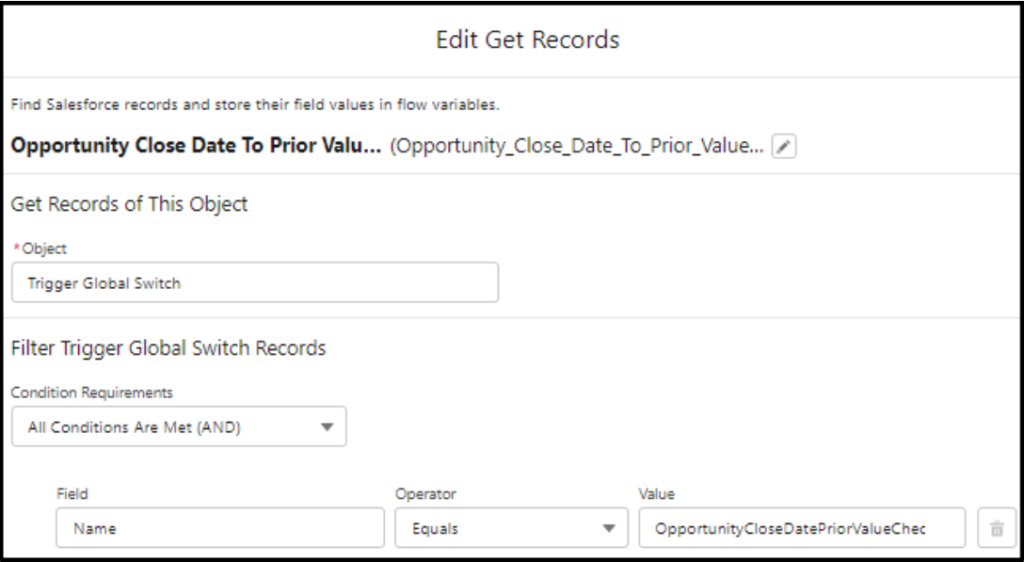
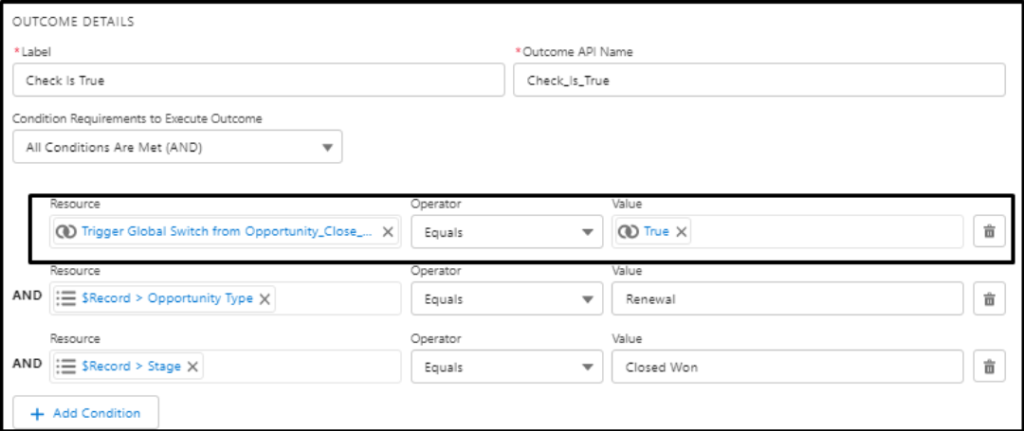
When we fetch these records in the flow, we’ll need to make sure that we fetch them by the name of the functionality we saved. In the below screenshot, you can see we are fetching the switch with a condition of specific name.
In the below screenshot, you can see how we are using the switch record we fetched in the decision flow. This will ensure that the node will only execute if we have enabled it in the switch.
NOTE: There are two ways by which we can get the metadata records. One from querying with the GET Records Element and the other one is to call invocable apex where we can pass the required parameters and get the values of Active field whether it is active or not.
Custom Setting Hierarchy Type
Below is the screenshot of the Custom Setting of Hierarchy type.
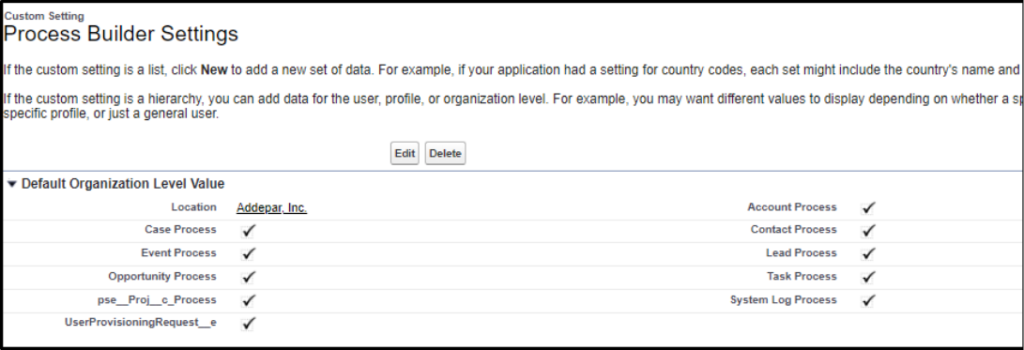
Good thing about having the Custom Setting of this type is that we don’t need to query it in the flow. We can simply add the particular automation name in the decision element.

This is how we can directly get the custom setting of hierarchy type in the decision element. No need to query the data.
One flow per object?
The reason for this framework was to move automations from WFRs and PBs to flows with all the new functionalities built in this structure too. These two are the basic use for this structure. The only thing to note here is that we are only working with Record Triggers flows and Auto-Launch flows.
In Record Triggered flow we can have two types
- Flow with Fast field updates
- This flow runs before the record is saved so it’s preferable that the work that we can do in the before context we should do the same in this flow.
- Flow with Action and Related Records
- This flow runs after the record is saved. Similar to the after context in apex triggers.
- If we need to send any email alerts or we need to use the Action then we must need this flow.
Let’s have a look at One Flow Per Object with some examples.
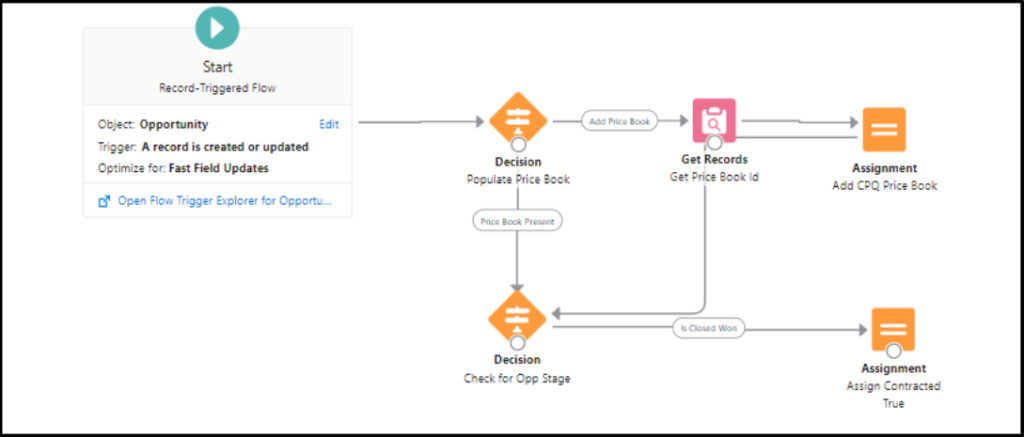
Before Context Flow
In before context flow we have the following available elements in the flow.
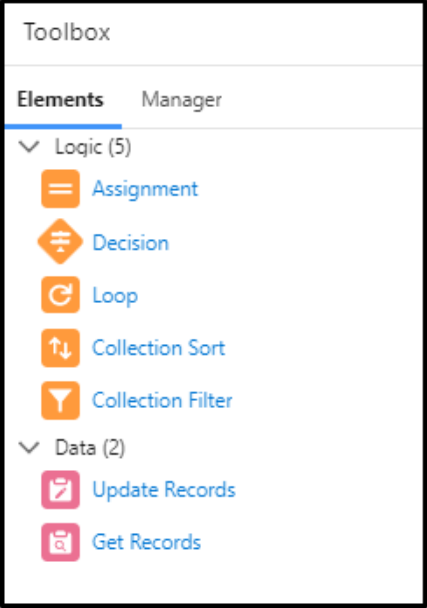
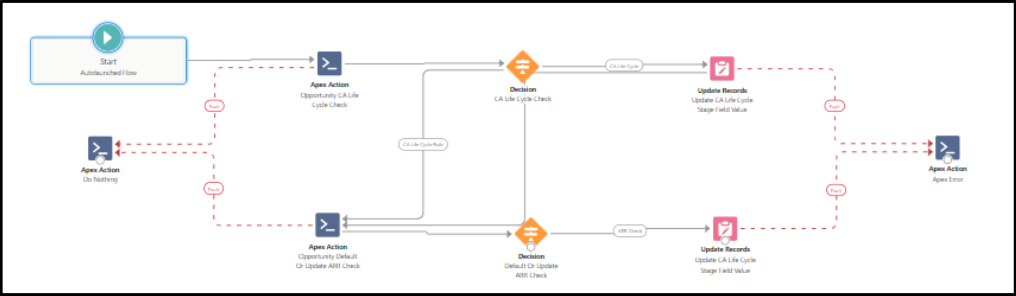
We have no Action and Sub-flow elements available in the Before Context Flow. Below is one example for the approach that we must follow to build the functionality in the before context flows. We need to follow this Z structure in our flows.
NOTE: If we need to use Get Record Element From in the flow then we can simply follow the below pattern.
After Context Flows
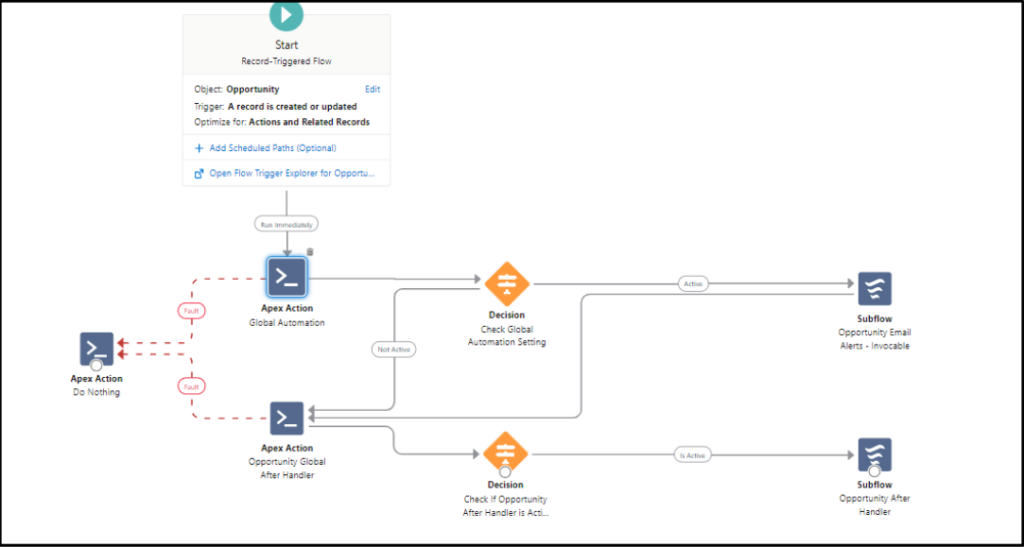
In After context Flow we will have sub-flows and Action Elements available in the Toolbox. In after context flow we will be using sub-flows to create a separate path for separate functionalities. The idea behind creating sub-flows is to control each functionality as a separate functionality. You need to make sure which of these functionalities can be grouped together and made a sub-flow out of.
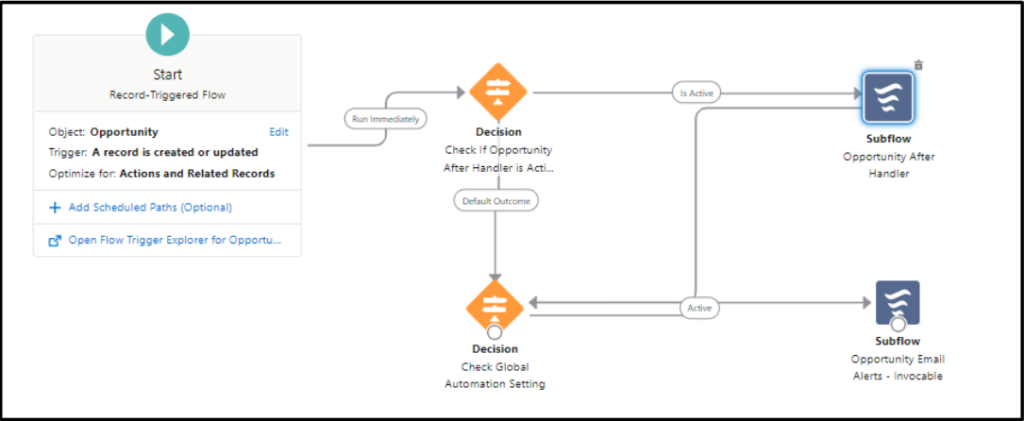
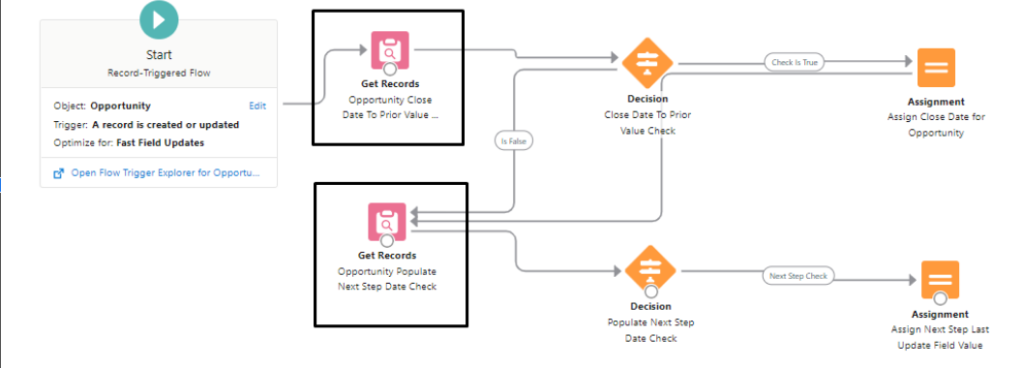
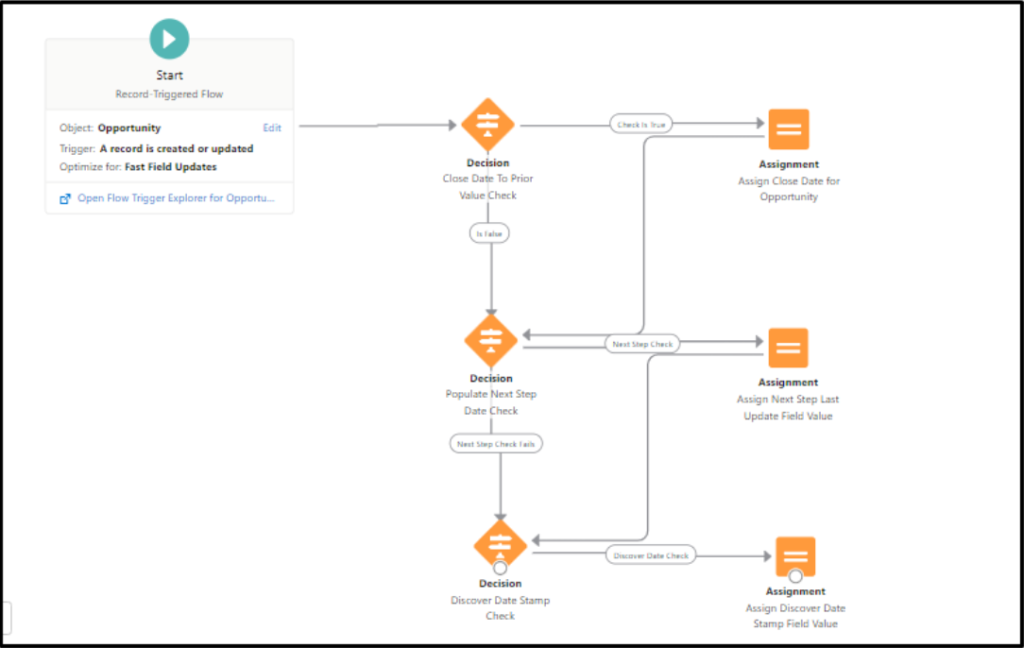
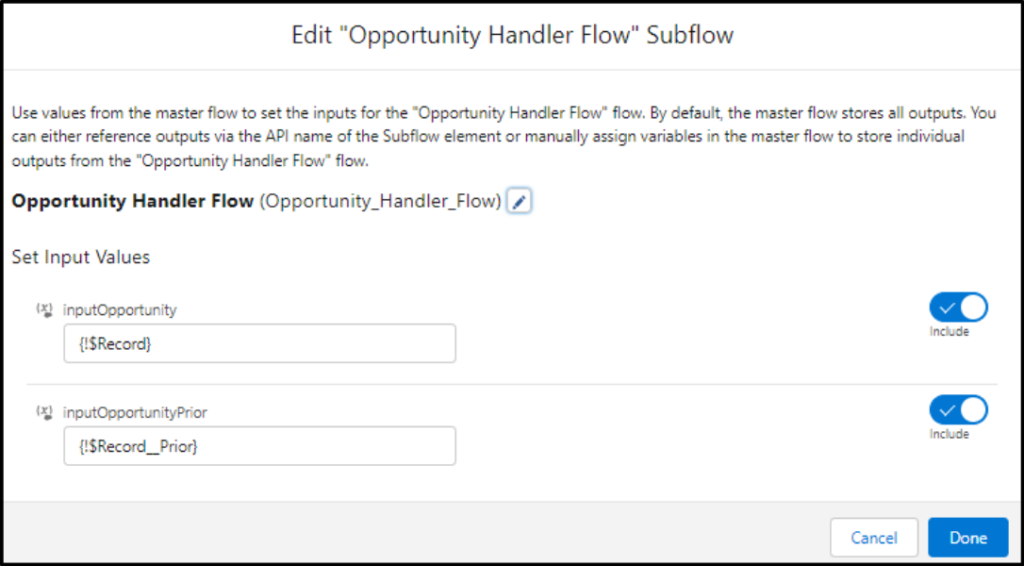
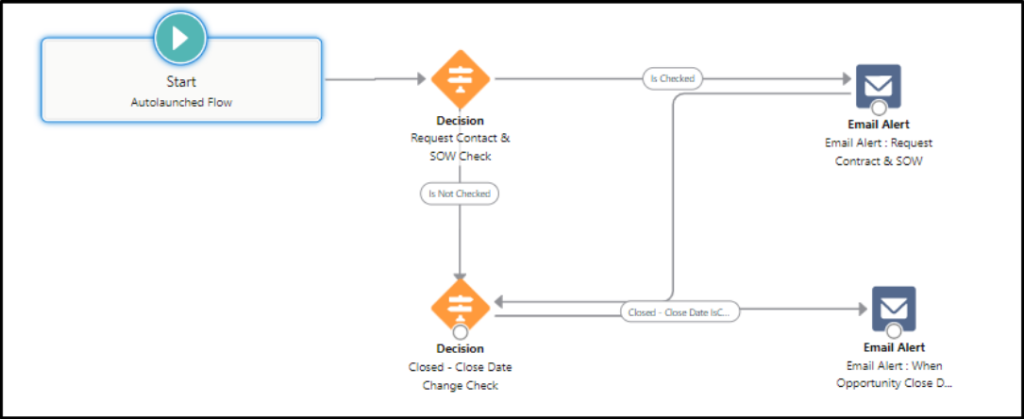
Every Record Triggered Flow should look like this, In above screenshot, Opportunity record triggered flow have two sub-flows connected with two decision elements. This is the key part of this structure. We have custom switches in place in the decision element in the form of custom setting. To every sub-flow we will pass these two given values of object record type.
Look at the names of the sub-flows. Why do we have two sub-flows? Let’s dive deeper.
First Sub-flow: Opportunity After Handler
In this Sub-flow we will be having all the standalone automations and functionalities which do not contain any email alerts(separate sub-flow for emails). Note, before moving or creating any functionalities into this sub-flow, you first need to decide, whether the automation you’re about to create can be done in before context, if it can be, move it to before flow which we explained above.
Now if we look at the above picture we have one other sub-flow that we called from the Opportunity Handler flow. Now the only thing we need to take care of is not to create too many sub-flows. Well, how would we know when to create a sub-flow and when not?
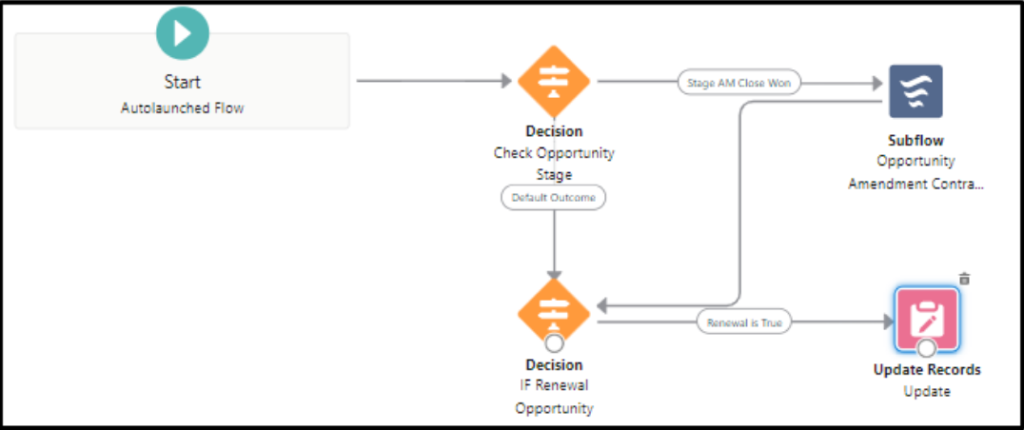
Whenever your separate functionality needs different conditions, data from other objects and some calculations, then we need to build a subflow as that sub-flow cannot be contained in a single decision element. In the above screenshot, the first path leads to a sub-flow, which means that the sub-flow functionality contains some other data and calculations.
When your functionality is rather simple and doesn’t require much other data and calculation and just needs a DML, you can directly include the DML rather than calling a separate sub-flow and doing the DML. See the above screenshot, the second path leads to a direct DML rather than a separate Sub-flow.
Second Sub-flow: Opportunity Email Alerts Invocable
In this sub-flow we will have all the email alerts related operations. The main reason for creating a sub-flow just for email alerts is that we can turn off all the email alerts from one place. In some cases of bulk updates, we don’t want unnecessary email alerts being sent, so using this structure we can turn the email alerts off to be on the safe side.
Quick Read: Email to Salesforce – A feature not enough used
If we just want to turn certain alerts off, use the switch to control it via a Custom Setting or Custom Metadata.
This is how our Email Alerts Invocable sub-flow looks like. In every decision we have a dedicated switch from where we can simply stop any action node from executing
Error Handling in Flows
It’s recommended that we should do error handling wherever possible. We need error handling in Flows as well. If not, who will tell us what is wrong with our Flow, depriving us of putting blame on someone we don’t like.
So create a Custom Object, put a fault path in your Apex Invocable calls, get records or DMLs and insert an entry of your custom object with all the error details.
Note: We can add the Error handling path from the Action Element, Get Record Element and from DML elements.
This is an example of the Error handling with extensible control over the automations. In the apex action node we can create records of the Error logs entries with the fields details mentioned above like object name, process name, exception type and message.
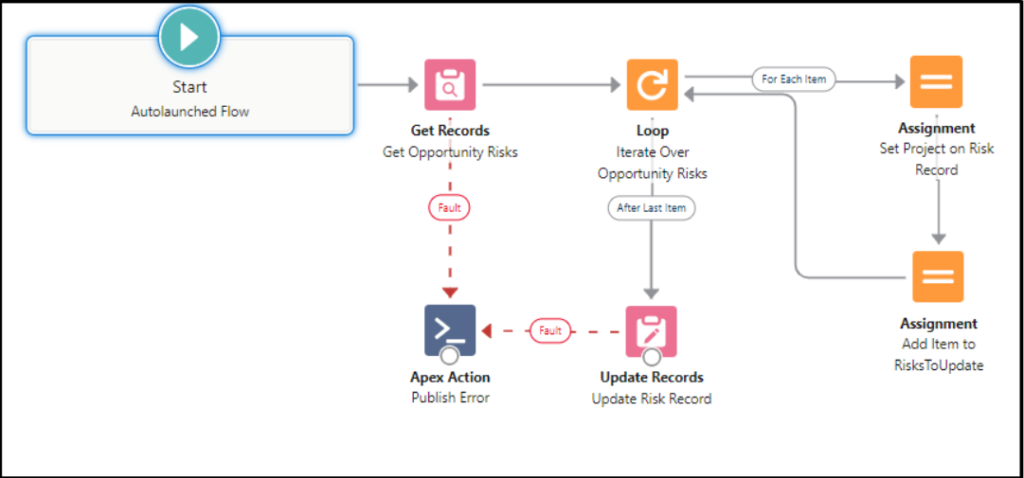
This is one sub flow where we are performing some of the automations. See how in every Get Records Element and DML Elements we are putting up a fault path and pushing it to an Apex Action. This Apex action does the error handling by creating a record of your Error Log object. It depends on you, whether you want to log an entry in a custom object or to send an email or simply ignore it. It’s all up to you.
Quick Read: Salesforce DevOps Center- Quick Setup Example
So we are at the end of this article. With this structure, you will be able to move your WFR’s and Process Builders into flows. Also, create new functionalities and embed them in already built flows. I created this framework 2 months ago, so, if you have any questions, please message me on my LinkedIn, Abhishek Saxena. Last but not the least, thanks Kamal Thakur for helping me edit this article. Till then, happy coding.